Linux Related -> Tutorials -> How to Install Debian From Scratch
How to Install Debian From ScratchDebian From Scratch(DFS) is a unique distribution that allows you to install a Debian system with almost the same level of control as what you would get with a Linux From Scratch installation but with the Debian advantages (easy to update and maintain). Installing DFS enables you to really understand how the linux installation process works and allows you to control what is installed where in the new system. This level of control makes it really suited for servers because there is no unwanted service installed on the system which makes it easier to harden the system.
I decided to try DFS after reading about it in an article by Bruce Byfield in Newsforge. This article is an expansion of the original article 'cause even though I managed to install DFS by following the directions in the article I had to jump through a few hoops to get it fully working. So In this article I am trying to document what I did so that others can benefit from my experience and hopefully have an easier time installing DFS than I did.
Created by: Suramya Tomar
Last updated: 04th March 2006
Original Article: 11th May 2005
This document is Copyright © 04th March 2006, Suramya Tomar.
It is released to the public under the
Creative Commons Attribution-ShareAlike 1.0 License
You are free:
- To copy, distribute, display, and perform the work
- To make derivative works
- To make commercial use of the work
Under the following conditions:
Attribution. You must give the original author credit.
Share Alike. If you alter, transform, or build upon this work, you may distribute the resulting work only under a
license identical to this one.
- For any reuse or distribution, you must make clear to others the license terms of this work.
- Any of these conditions can be waived if you get permission from the author.
Use the information in this document at your own risk. I disavow any potential liability for the contents of this document. Use of the concepts, examples, and/or other content of this document is entirely at your own risk. They worked on my system but it doesn't necessarily mean that it would be safe to do the same on your system.
All copyrights are owned by their owners, unless specifically noted otherwise. Use of a term in this document should not be regarded as affecting the validity of any trademark or service mark.
You are strongly recommended to take a backup of your system before performing any of the actions listed in this document .
In this section I have the pleasure of acknowledging the following people without whose input this would have never seen the light of the day:
- John Goerzen for creating the DFS project and writing a brief installation guide
- Bruce Byfield for writing about DFS and introducing me to it via his article
- Matt Hoskins and Kevin Walsh, for getting me interested in linux in the first place.
- My friends and family, for bearing with me when I was compiling this document
Debian From Scratch (DFS) is available for download from John Goerzen's website as a 401 MB ISO image for the i386 platform or a 338 MB ISO image for the Alpha platform. At the time of this article the latest version for the i386 platform is dfs-0.6.19
Download the appropriate ISO from the site above and burn it to a CD using an appropriate CD burning software. Check out this article on how to burn ISO images using Nero Express in case you havn't done this before. You should also check out this site for instructions on how to burn iso images using various programs on Linux and Windows platforms.
Before we start the installation of DFS we need to do a little bit of reconnaissance on your system to get the required information on your hardware and network setup. Having this information handy will make life a lot easier for us when we are installing DFS.
First thing we need to do is find out the details on all the hardware installed on the system we are installing DFS on. In the beginning you can leave out the more fancy equipment like soundcard, TV tuner card etc and just concentrate on the hardware you need to get the system up and running, this includes: the video card, Network card, USB devices (Keyboard, mouse) etc. You might also want to note down details on your monitor including the scan rate and the max screen resolution supported etc.
Now that you have collected the information on your hardware, we need some basic information on your network setup also. This step is not required if you don't have a network and are not going to be installing any updates using apt-get from the Debian mirror's. If your network has a dhcp server then all you need to note down is the DHCP server's IP address and you are set. On the other hand if you don't have a DHCP server on the network or if you are planning on giving a static IP to the new box you need to find out what your Gateway IP, Subnet mask and DNS server IP's are. If you have an existing linux server on the same network you can get this information from the /etc/resolv.conf file and the /etc/network/interfaces file.
Once we have the network information we need to decide what mirror we will be using to download packages from when we use apt-get to install new software. Debian's server mirror list has a listing of all the debian mirrors world wide. You can either choose a mirror from this list or copy the /etc/apt/sources.list file from an existing debian installation.
Once you have collected this information we can proceed with the DFS installation.
Starting the DFS install is pretty easy, all you have to do is insert the CD you created from the ISO image in your CD-ROM and tell your computer to boot from it. If your computer doesn't boot from the CD-ROM when your restart it, you may need to change your boot sequence in the BIOS to let the computer boot from the CD-ROM first. Check out this site for instructions on how to change the boot order on your computer. You could also contact your local sysadmin to walk you through this process. Keep in mind that you should always carry some peace offering for the sysadmin before you bother them to prevent them from turning into the BOFH. :)
Once you have configured your system to boot from the CD-ROM and managed to get the system to boot from the CD-ROM you will see a menu where you can choose the kernel you want to use in the new system. I choose 2.6.11 but you can choose whatever version you like and press enter (see Figure 1.1). Once you make a selection you will see the normal linux boot messages scroll by on the screen.

Figure 1.0 Grub Boot screen for DFS
Once the boot process is completed you will be prompted for a username, enter 'root' (Without the quotes) as the username and press enter, if you are prompted for a password just hit enter. This will log you in as the root user
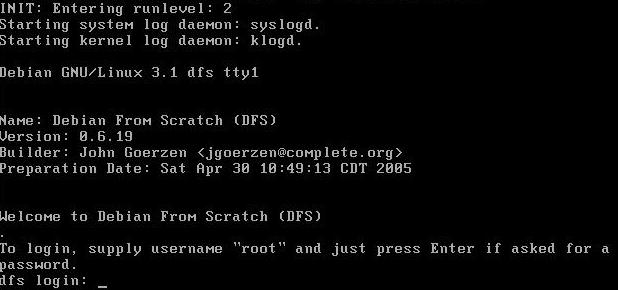
Figure 1.1 Login prompt for DFS
Once we are logged in, we need to make sure that all our devices have been properly detected by DFS (esp the USB devices). First we perform a general hardware detection by running the following command:
invoke-rc.d discover start
and then we run the following command to detect the USB devices present on the system.
invoke-rc.d hotplug start
Keep in mind that you will probably see some error messages stating that the USB modules are already loaded but thats ok. This step was taken just to make sure that we didn't miss anything while discovering hardware in the previous step.
This step is only needed if you have a network card and are going to use it. If you have a dhcp server running on your LAN all you need to do is run the following command and your network connection will be activated:
ifup eth0
If you are not using a DHCP server or are planning to give the new system a static IP you need to edit the /etc/networking/interfaces file and add the following lines to it:
iface eth0 inet static address 192.168.0.4 netmask 255.255.255.0 gateway 192.168.0.1
Replace the IP's in the above example with the correct values for your network (You should have collected this information for Step 3.0 above)
You also need to edit the /etc/resolv.conf file and add the following line to it:
nameserver 192.168.0.1
Make sure you replace the IP address in the example above to the correct one for your network. Now save the changes and activate the network by running the following command:
ifup eth0
Run /sbin/ifconfig to make sure that the network card came up properly. If everything looks ok we can proceed to the next step of the installation process
The next step we have to do is partition the drive for Linux. DFS includes both fdisk and cfdisk for this process. cfdisk is a lot simpler than fdisk so we will be using it to partition the drive. If you decide to use fdisk instead and need help check out this site for help. To start cfdisk run the following command:
cfdisk /dev/hdx
Where /dev/hdx is the drive you are parititioning. Check out this article if you are feeling lost for more information on Linux device naming conventions. So if you are partitioning hda (The master drive on IDE0) we would run the following command:
cfdisk /dev/hda
Once cfdisk starts you will see an interface where the current partition table is listed with the names and some data about each partition, and some command buttons on the bottom of the screen (See Figure 2.0).
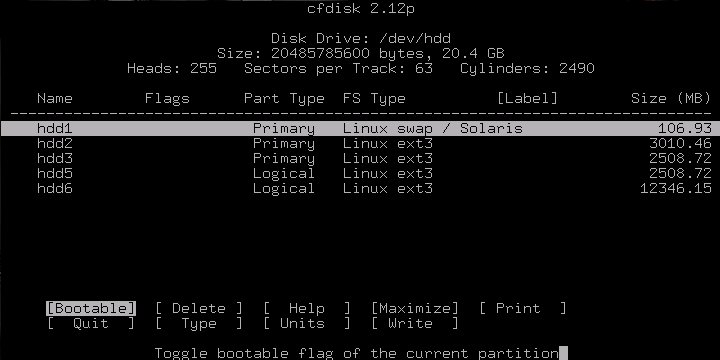
Figure 2.0 cfdisk user interface
Now you should create your partitions using cfdisk. At a minimum a swap and a '/' (Root) partitions are required. Check out this article if you need help in partitioning the drives. Once you have created your partitions, save the changes and exit from cfdisk
Now we need to format the / partition to ext3 (I like ext3 but you can use whatever filesystem you like) using the following command (Where /dev/hda2 is your root partition. Replace this with the appropriate device id for your system):
mkfs.ext3 /dev/hda2
and once the partition is formated we mount it for read-write access by issuing the following command:
mount /dev/hda2 /mnt
Next we need to initialize the swap partition by issuing the following command (Where /dev/hda1 is your swap partition):
mkswap -f /dev/hda1
and mount the swap partition using:
swapon /dev/hda1
If you don't get any errors, proceed to the next step of the install.
Now we install a very basic Debian install by issuing the following command:
cdebootstrap sid /mnt file:///opt/packages
This command install's Debian sid in the /mnt directory without using any package tools like apt or dpkg. This step will take some time so you might want to go read a book while it finishes.
Once the basic debian system finishes installing we need to configure it for our use and the first step in this process is to copy the /etc/resolv.conf to /mnt/etc/resolv.conf and /etc/network/interfaces to /mnt/etc/network/interfaces .
Next we need to edit the /mnt/etc/apt/sources.list and add some Debian mirror addresses to it. These mirror locations will be used to download packages we will be needing later in the guide. Try to choose mirrors that are closest to you so that you get a good download speed. A complete list of Debian mirror's is available at: http://www.debian.org/mirror/list. On my system the sources.list looks like:
deb http://security.debian.org/ sarge/updates main contrib non-free deb http://ftp.debian.org/debian/ unstable main contrib non-free deb-src http://ftp.debian.org/debian/ unstable main contrib non-free deb http://mirrors.kernel.org/debian/ testing main contrib non-free deb http://security.debian.org/ testing/updates main contrib non-free
The kernel on the DFS cd is a good one to start off with so we will install it on our new system by issuing the following commands:
cd /mnt/root dpkg-repack kernel-image-2.6.11
This creates a kernel-image-2.6.11_dfs.1.0_i386.deb file in the /mnt/root directory. Now we chroot to the new install by issuing the following command:
chroot /mnt
The we can install our new kernel by issuing the following command:
dpkg -i root/kernel-image-2.6.11_dfs.1.0_i386.deb
Before we do anything we need to activate the network card and make sure that we have a working connection to the net. Run the following command to start the network card and get an IP:
ifup eth0
If you are trying to get a DHCP address you might get an error message complaining that /proc/net/dev doesn't exit. If thats the case then create the directory by running the following commands:
mkdir /proc/net/ mkdir /proc/net/dev
then try to start the network again using:
ifup eth0
/etc/fstab tells the kernel what partitions to mount and what locations they should be mounted at. On my system the /etc/fstab looks like this:
# filesystem mountpoint type options dump pass /dev/hda2 / ext3 defaults,errors=remount-ro 0 1 /dev/hda1 none swap defaults 0 0 proc /proc proc defaults 0 0 usbfs /proc/bus/usb usbfs devmode=0666 0 0 /dev/cdrom /cdrom iso9660 defaults,ro,users,noexec,noauto 0 0
You should modify the above example to point to the correct partitions for your install.
The DFS install is a very basic install so we need to install a couple of packages in order to make the system usable. But before we can begin installing packages via apt-get install we need to get a list of the latest packages available from the debian mirrors listed in /etc/apt/sources.list. We do this by running the following command:
apt-get update
Once the update is complete we can begin installing packages. The first package we need to install is makedev which creates device files in /dev. The following command will install makedev on our system:
apt-get install makedev
Then we need to install procps which installs the /proc file system utilities by issuing the following command:
apt-get install procps
Once both packages are installed we need to install a bootloader so that we can boot into the new system. In our case we are going to install GRUB. You can install lilo instead of grub if you prefer but in my opinion GRUB is more powerful and stable. To install GRUB we need to run the following command:
apt-get install module-init-tools grub
Now we configure GRUB by following these steps:
- Create a directory in the /boot folder to store grub files in by issuing the following command
- Copy the GRUB files to this directory using the following command:
- Start the GRUB command line interface by issuing the following command:
- Tell GRUB where the root of our install is located by running the following command (This command tells GRUB that the root partition is on the 2nd partition on the 1st harddisk (hda2)):
- Install the bootloader to the MBR (Master Boot Record) by running the following command:
- Exit from the GRUB command line interface by issuing the following command:
- Force GRUB to update itself by running the following command:
- When asked if you want to Let the system generate the menu.lst file for you answer 'Y'.
- Edit the menu.list file to make sure it points to the correct kernel and partition. If any of these locations are invalid the system will halt with a kernel panic when re-booted. On my system the menu.list looks like this:
mkdir /boot/grub
cp /lib/grub/i386-pc/* /boot/grub/ -R
grub
root (hd0,1)
setup (hd0)
quit
update-grub
default 0 ## timeout sec timeout 5 # Pretty colours color cyan/blue white/blue title Debian GNU/Linux, kernel 2.6.6 root (hd0,1) kernel /vmlinuz root=/dev/hda2 boot
/vmlinuz is a symlink that points to /boot/vmlinuz-2.6.6 and (hd0,1) is where the / partition of my system is installed. You should modify these values to point to the correct partitions for your install, double check the values put in by the autoconfiguration because it might have generated an incorrect file (as it did on my system).
Now all we need to do is exit from the chroot environment and reboot the system. We do it by typing:
exit
at the command prompt followed by
reboot
Once the system reboots you should remove the DFS disk and boot into the new system. Keep in mind that this is a very minimal install so you will need to install a lot of packages. I suggest installing openssh to allow you to access the system remotely. Other than that you are free to install any packages you feel like.
Please remember to change the root password on the new system from the default value of blank to something more secure.
By now I have hopefully saved you a lot of trouble by telling you how to install DFS quickly and easily. If you think this document helped you or you have some comments or questions about this please feel free to Contact Me and let me know. However I must warn you that I am a somewhat lazy person who might take a little while before replying to your emails.
Thanks for your time.
- Suramya Tomar
04th March 2006

Home | About Me | About India |Hotlinks | Linux Related |
Mirror | Misc Section | My Blog | Photogallery | Scripts | Tech Section | Contact Me